
The allure of the curved kitchen is undeniable. It's a design choice that softens the harsh lines typically associated with kitchen layouts, creating a more inviting and fluid space. And at the heart of this design is often the curved kitchen island. It's more than just a surface to prepare food; it's a focal point, a gathering place, and a statement piece. But designing a curved kitchen, especially incorporating a curved island, requires careful planning. Let's dive into the world of curved kitchen design, exploring island dreams and seating ideas that will transform your kitchen into a beautiful and functional heart of your home.
Understanding the Appeal of Curved Kitchens
Why choose a curved kitchen? The answer lies in the aesthetic and functional benefits. Curves naturally guide the eye, creating a sense of flow and movement within the space. Unlike sharp corners that can feel abrupt, curves offer a softer, more organic feel. This can be particularly beneficial in smaller kitchens, where a curved island can help to maximize space and improve traffic flow. Curves also introduce an element of elegance and sophistication. They elevate the design beyond the ordinary, making a bold statement about your personal style. Functionally, a curved island can make it easier to access different work zones within the kitchen, improving efficiency and collaboration. Consider the ergonomics of meal preparation. A curved design can allow for a more natural and comfortable workflow.
Planning Your Curved Kitchen Island: A Step-by-Step Guide
Designing a curved kitchen island requires careful consideration of several factors. It's not just about aesthetics; it's about creating a functional and harmonious space.
Step 1: Assess Your Space. Before you start dreaming up elaborate designs, take a hard look at your kitchen. Measure the available space meticulously. Consider the existing layout, the placement of appliances, and the location of doorways and windows. Think about how people move through the kitchen. Will a curved island improve the flow or create a bottleneck? Visualizing the space is crucial. Use masking tape to outline the proposed island shape on the floor to get a sense of its size and impact.
Step 2: Define Your Needs. What do you want your curved island to accomplish? Is it primarily a food preparation area, a breakfast bar, or a combination of both? Do you need storage space, a sink, or a cooktop? Consider your cooking style and how you use your kitchen on a daily basis. Identifying your needs will help you determine the size, shape, and features of your island.
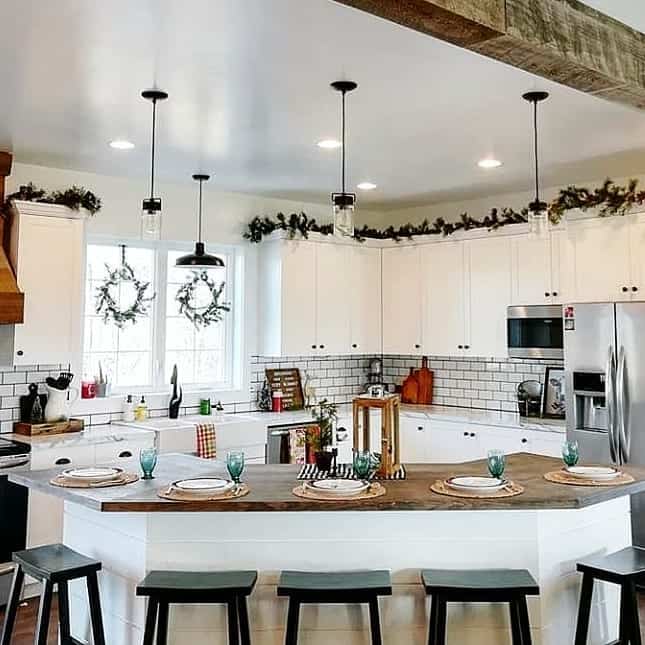
Step 3: Choose Your Shape. The shape of your curved island is a key design element. A gentle arc can create a subtle and elegant feel, while a more dramatic curve can make a bold statement. Consider the overall style of your kitchen. A modern kitchen might benefit from a sleek, minimalist curve, while a traditional kitchen might call for a more ornate and flowing design. Also, think about functionality. A horseshoe-shaped island, for example, can create a dedicated cooking zone, while a kidney-shaped island can provide ample seating and counter space.
Step 4: Select Your Materials. The materials you choose will significantly impact the look and feel of your curved island. Consider durability, maintenance, and aesthetic appeal. Quartz and granite are popular choices for countertops due to their durability and resistance to stains and scratches. Wood can add warmth and character, but it requires more maintenance. For the island base, consider materials that complement your existing cabinetry. You can also use contrasting materials to create visual interest. Don't overlook the importance of lighting. Under-cabinet lighting can highlight the curve of the island and provide task lighting for food preparation. Pendant lights can add a touch of elegance and define the seating area.
Step 5: Consider Ergonomics. Ensure the island height is appropriate for your needs. A standard countertop height is around 36 inches, but you may want to consider a taller bar-height island for seating. The overhang for seating should be at least 12 inches to provide adequate legroom. Also, think about the placement of appliances. Ensure they are easily accessible and that there is sufficient workspace around them.
Step 6: Plan Your Storage. A curved island offers unique storage opportunities. Consider incorporating curved drawers, pull-out shelves, and open shelving to maximize storage space. You can also use the space beneath the overhang for seating to create hidden storage compartments. Think about how you can use the storage to organize your kitchen essentials.
Step 7: Integrate Utilities. If you plan to include a sink or cooktop in your curved island, you'll need to plan for plumbing and electrical connections. Work with a qualified contractor to ensure that these utilities are properly installed and meet all safety codes. Consider the placement of outlets for small appliances.
Step 8: Finalize Your Design. Once you have considered all of these factors, it's time to finalize your design. Create a detailed drawing or rendering of your curved island. This will help you visualize the finished product and ensure that all of the details are correct. Work with a kitchen designer or contractor to refine your design and ensure that it is feasible and meets your needs and budget.
Step 9: Professional Installation. While some homeowners may be tempted to tackle the installation of a curved island themselves, it's generally best to hire a professional. Installing a curved island requires specialized skills and equipment. A professional installer can ensure that the island is properly installed and that all of the connections are safe and secure.
Seating Ideas for Your Curved Kitchen Island
Seating around a curved kitchen island adds functionality and creates a welcoming space for family and friends. The shape of the island opens up unique opportunities for seating arrangements.
Curved Seating: Embrace the curve! Look for bar stools or chairs that have a curved back or seat to complement the island's shape. This will create a cohesive and harmonious look.
Varying Heights: Consider using different heights of seating to add visual interest. You could have taller bar stools at one end of the island and shorter chairs at the other.
Mix and Match: Don't be afraid to mix and match different styles of seating. This can add personality and create a more eclectic look. Just be sure that the different pieces complement each other in terms of color and material.
Backless Stools: Backless stools are a great option for maximizing space and keeping the focus on the island itself. They also allow for easier movement around the island.
Upholstered Seating: Upholstered bar stools or chairs can add comfort and luxury. Choose fabrics that are durable and easy to clean.
Swivel Seating: Swivel seating allows people to easily turn and interact with others in the kitchen. This is a great option for creating a more social and interactive space.
Consider Legroom: Ensure that there is adequate legroom for comfortable seating. The overhang for seating should be at least 12 inches.
Number of Seats: Determine how many seats you need based on your family size and how you plan to use the island. Avoid overcrowding the island with too many seats.
Emerging Technologies and Innovations in Curved Kitchen Design
The world of kitchen design is constantly evolving, and there are several cutting-edge innovations that are transforming the way we think about curved kitchens.
3D Printing: 3D printing is making it possible to create custom-designed curved islands with intricate details and complex shapes. This technology allows for unparalleled design flexibility and personalization.
Smart Kitchen Technology: Integrate smart kitchen technology into your curved island to enhance functionality and convenience. Consider features such as built-in charging stations, smart lighting, and voice-activated controls.
Sustainable Materials: Embrace sustainable materials to create an eco-friendly curved kitchen. Consider using recycled materials for the island base and countertops.
Integrated Appliances: Seamlessly integrate appliances into your curved island to create a sleek and modern look. Consider features such as induction cooktops and hidden refrigerators.
Lighting Innovations: Use innovative lighting techniques to highlight the curve of your island and create a dramatic effect. Consider using LED strip lighting, recessed lighting, and pendant lights.
Interactive Surfaces: Explore the possibilities of interactive surfaces for your curved island. Imagine a countertop that can display recipes, control appliances, and provide entertainment.
Color-Changing Technology: Incorporate color-changing technology into your curved island to create a dynamic and ever-changing look. This can be achieved through the use of LED lighting or color-changing paint.
Addressing Current Challenges in Curved Kitchen Design
While curved kitchens offer numerous benefits, they also present some unique challenges. Let's explore some common issues and how to overcome them.
Cost: Curved cabinetry and countertops can be more expensive than their straight counterparts. To mitigate costs, prioritize essential features and explore cost-effective materials. Consider using a combination of curved and straight elements to achieve the desired look without breaking the bank.
Customization: Finding pre-fabricated curved components can be difficult. Be prepared to work with a custom cabinet maker or countertop fabricator. Thorough planning and accurate measurements are essential for a successful outcome.
Space Limitations: Curved islands can take up more space than straight islands. Carefully assess your kitchen layout to ensure that you have enough room for a curved island without compromising traffic flow. Consider a smaller, more compact design if space is limited.
Installation: Installing curved cabinetry and countertops can be more complex than installing straight elements. Hire a professional installer with experience in curved kitchen design.
Maintenance: Curved surfaces can be more difficult to clean than straight surfaces. Choose materials that are easy to maintain and regularly clean your curved island to prevent dirt and grime buildup.
Ergonomics: Ensure that the curved island is ergonomically designed for comfortable use. Consider the height of the countertop, the overhang for seating, and the placement of appliances.
Integration with Existing Design: Blending a curved element into an existing rectilinear kitchen can be tricky. Use consistent materials and colors to create a cohesive look. Consider the overall style of your kitchen and choose a curved design that complements it.
Strategic Recommendations for a Successful Curved Kitchen
Here are some strategic recommendations to ensure the success of your curved kitchen project:
Hire a Professional: Work with a qualified kitchen designer and contractor who have experience in curved kitchen design. Their expertise can help you navigate the challenges and achieve your desired results.
Plan Thoroughly: Spend ample time planning your curved kitchen. Consider all of the factors discussed above and create a detailed design plan.
Communicate Clearly: Communicate your vision clearly to your designer and contractor. Provide them with detailed drawings, renderings, and specifications.
Be Flexible: Be prepared to make adjustments to your design as needed. Curved kitchens can present unexpected challenges, so flexibility is key.
Set a Realistic Budget: Be realistic about the cost of a curved kitchen. Curved elements can be more expensive than straight elements, so be sure to factor this into your budget.
Focus on Functionality: While aesthetics are important, don't overlook functionality. Ensure that your curved kitchen is designed to meet your needs and lifestyle.
Choose Quality Materials: Invest in quality materials that will withstand the rigors of daily use. This will ensure that your curved kitchen looks beautiful and functions well for years to come.
Embrace the Curve: Don't be afraid to embrace the curve! A curved kitchen can be a stunning and functional addition to your home.
The journey to a curved kitchen with a stunning island may seem complex, but with careful planning and execution, it can be a rewarding experience. The key is to assess your space, define your needs, and choose materials and seating that complement the curve and enhance functionality. Remember to embrace emerging technologies and address potential challenges with strategic solutions. Now, take that first step and begin sketching out your island dreams; a beautifully curved and functional kitchen awaits!